Engineered wood flooring has become a staple in modern homes, offering the warmth of real wood with enhanced stability. However, even this durable option isn’t resistant to the wear and tear of daily life. While engineered wood flooring is known for its durability and aesthetic appeal, it’s not immune to dents, scratches, or even water damage.
Many industry experts suggest that replacing individual boards can be significantly more cost-effective—sometimes saving up to 75% of the cost—compared to reinstalling the entire floor.
In this guide, we’ll provide you with comprehensive, expert-backed solutions for DIY replacement of damaged engineered wood flooring, helping you save time and money.
Understanding the specific types of damage that engineered wood flooring can sustain is vital for effective maintenance and repair.
Recognising these issues not only aids in timely interventions but also helps in choosing the right solutions to preserve the beauty and functionality of your flooring.
Expert Insight:
“The most common cause of damage we see is due to moisture issues, often from spills or high humidity levels. Understanding the source of the damage is key to preventing future occurrences.” — John Smith, Flooring Specialist
Before starting your DIY project, make sure you have the following tools and materials:
Local hardware stores or specialised flooring shops often have a variety of materials, including replacement boards, adhesives, and finishing products. Visiting these stores allows you to see and feel the materials before purchasing, ensuring a better match with your existing flooring.
Websites like Amazon and eBay offer a wide selection of tools and materials, often at competitive prices. Look for high-rated products and read customer reviews to ensure quality. Additionally, websites like Wickes, B&Q, and Screwfix are excellent resources for sourcing professional-grade tools and flooring supplies in the UK.
Lorem ipsum dolor sit amet, consectetur adipiscing elit. Ut elit tellus, luctus nec ullamcorper mattis, pulvinar dapibus leo.
Many flooring manufacturers sell replacement boards and accessories directly through their websites. This can be particularly useful if your flooring is a specific brand or has a unique finish that’s hard to match elsewhere.
For older or discontinued flooring styles, salvage yards or reclaimed wood suppliers can be valuable resources. They offer unique and sustainable options that can seamlessly blend with your existing floor.
Whether you prefer shopping in-store or online, be sure to compare prices, availability, and shipping times to find the best option for your project.
Expert Tip: Don’t overlook tools like a proper dust mask and knee pads. Safety first!
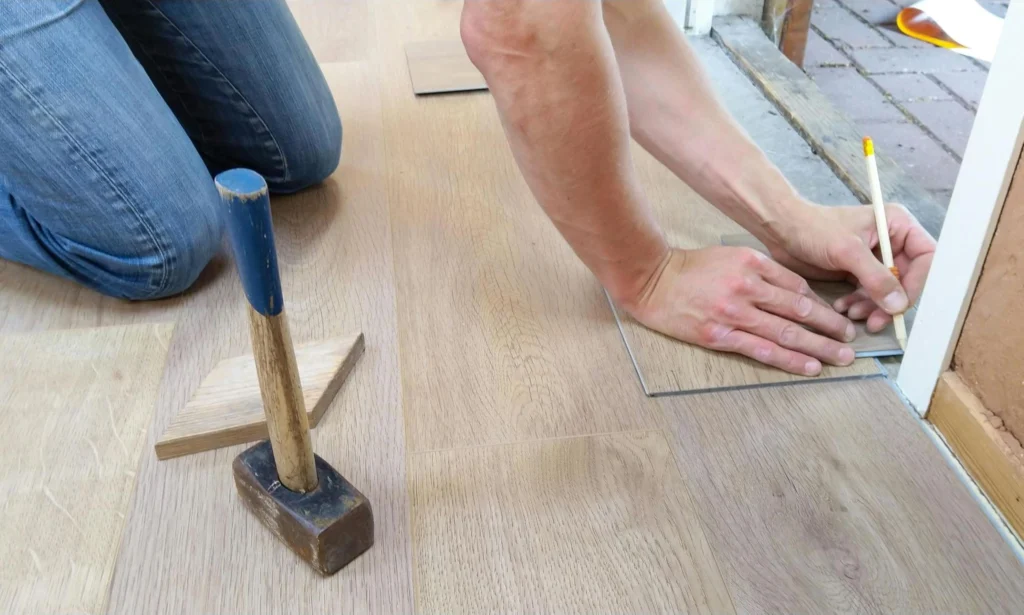
Replacing a damaged board might seem daunting, but with the right tools and guidance, it’s manageable even for beginners. Follow these steps carefully to achieve a seamless repair.
Always wear safety glasses and a dust mask to protect yourself from flying debris and dust particles.
Here is a step-by-step guide on how to replace damaged flooring:
If you notice gaps after installing the new board, use wood filler to fill in small spaces. For boards that don’t fit snugly, check your measurements and trim as needed.
If the new board sits higher or lower than the surrounding floor, ensure that all adhesive or debris has been properly cleared from the subfloor before installation. You may need to sand down minor high points or use a levelling compound for low areas.
If the new board makes noise when stepped on, check that it’s securely fastened. Apply a small amount of wood glue to the underside and press firmly. For persistent issues, adding a few finishing nails can help secure the board and eliminate creaking.
Before deciding on a replacement, consider whether a repair might suffice. Use the decision tree below to determine whether your damaged boards can be repaired or need replacement.
For minor surface scratches or dents, a simple repair kit can often restore the board to its former glory. However, deep gouges or water damage may require full board replacement.
Here is a comparison table of repair options for different types of damage:
| Type of Damage | Repair Option | Replacement Needed |
|---|---|---|
| Surface Scratches | Wood Filler, Sanding | No |
| Deep Gouges | Wood Filler, Sanding | Possibly |
| Water Damage | Drying, Stain Removal | Yes |
| Warping/Buckling | Reshaping, Drying | Yes |

When deciding between repairing or replacing engineered wood flooring, it’s crucial to weigh the costs involved. Minor repairs, such as fixing scratches or small chips, are relatively affordable while replacing individual boards can become pricier depending on the extent of the damage. The table below provides a detailed cost comparison to help you make an informed decision.
| Type of Damage | Repair Option | Replacement Cost (Per Board) |
|---|---|---|
| Superficial Scratches & Scuffs | £10 - £20 | Not applicable |
| Deep Gouges & Chips | £20 - £30 | £30 - £50 |
| Water Damage (Localised) | £20 - £40 | £30 - £60 |
| Buckling or Warping | Not Repairable | £30 - £60 |
| Discolouration or Staining | £15 - £30 (sanding & finish) | £30 - £50 |
| Loose Boards or Squeaking | £10 - £25 | £30 - £50 |
| Widespread Damage or Old Floors | Not Cost-effective to repair | Not Cost-effective to repair |

Choosing between a DIY approach and hiring a professional can be challenging. Here’s a detailed breakdown to help you make the right choice.
| Approach | Pros | Cons |
|---|---|---|
| DIY | Cost-effective, Flexible timing | Requires skills, Time-consuming |
| Requires skills, Time-consuming | Expert finish, Warranty options | Expensive, Scheduling challenges |
| Replacement Method | Estimated Cost | Description |
|---|---|---|
| DIY Replacement (Single Board) | £40 - £60 | Cost includes materials like the replacement board, adhesive, and any necessary tools. |
| Professional Replacement (Single Board) | £100 - £150 | Fee includes labour and materials provided by the professional, often ensuring a guaranteed finish. |
| Task | Difficulty (1-10) |
|---|---|
| Assessing Damage | 3 |
| Removing Damaged Board | 7 |
| Installing Replacement Board | 5 |
| Finishing and Blending | 4 |
Expert Tip:
If you’re uncertain, it’s best to consult a professional. At The Flooring Masters, our experts are always available to provide advice tailored to your situation.

Proper care and maintenance can extend the life of your engineered wood flooring significantly. Establish a regular cleaning schedule and use products specifically designed for wood floors.
Create a maintenance routine including regular sweeping, using a damp mop, and applying protective pads to furniture.
Replacing damaged boards is often a straightforward process, saving you the cost and hassle of replacing the entire floor. By following our expert guide, you can ensure your engineered wood flooring remains as stunning as the day it was installed.
For more information and expert advice, explore The Flooring Masters website, where you can order free samples and consult our specialists on any flooring-related queries.

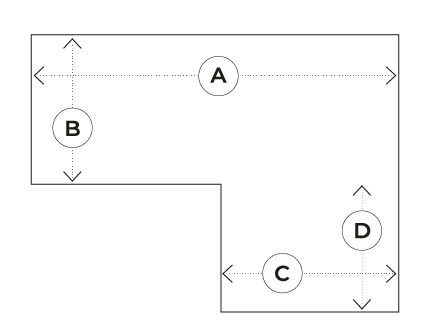
Example One: Rectangle Rooms

Example Two: Odd Shaped Rooms